


Explore the chemical composition and manufacturing process of dry ice.
Have you ever seen that cool fog effect at Halloween parties or in movies? That spooky mist often comes from dry ice! But what exactly is dry ice, and how is it made? Let’s dive into the chilly world of dry ice and uncover its secrets.
What is Dry Ice?
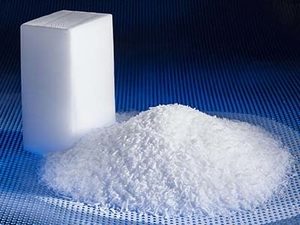
Dry ice is the solid form of carbon dioxide (CO₂). Unlike regular ice, which is frozen water, dry ice skips the liquid phase entirely. It goes directly from solid to gas in a process called sublimation. This is why you never see a puddle of water around dry ice as it “melts!”
How is Dry Ice Made?
The journey of dry ice begins with carbon dioxide gas, which is collected as a byproduct from various industrial processes like ammonia production and fermentation. This gas is then pressurized and cooled until it becomes a liquid. When the pressure is suddenly released, the liquid CO₂ expands and cools rapidly, forming solid CO₂, or dry ice. This solid CO₂ is then compressed into pellets, blocks, or slices, ready for use.
What’s the Chemical Composition?
Dry ice is pure carbon dioxide (CO₂). In its solid state, it’s extremely cold, at a chilling -78.5 degrees Celsius (-109.3 degrees Fahrenheit). Handling it without proper protection, like gloves, can cause frostbite. The low temperature is what makes dry ice perfect for preserving food, creating fog effects, and even for some industrial cleaning processes.
Is Dry Ice Eco-Friendly?
Now, you might be wondering, “Is dry ice good for the environment?” The answer is a bit nuanced. On one hand, dry ice itself doesn’t contribute to greenhouse gas emissions when used because it’s just carbon dioxide transitioning from solid to gas. However, the production of dry ice depends on the availability of CO₂ from industrial processes, which can involve the burning of fossil fuels—a significant source of greenhouse gases.
When dry ice sublimates, it returns to its gas form and mixes back into the atmosphere. Since it’s a byproduct that’s being reused, this recycling aspect can be seen as eco-friendly. But it’s crucial to consider the overall carbon footprint of the industries providing the CO₂.
Irish Carbonic Has Dry Ice
Dry ice is relatively inexpensive and easy to purchase. It’s also very user-friendly, provided you handle it properly. And when it’s time to purchase your dry ice, trust Irish Carbonic as your dry ice dealer in Central and Western New York.
You may not know how much you need. Don’t worry. The pros at Irish Carbonic will help you calculate exactly how much dry ice you’ll need for your project and give you tips on how to make it last for as long as possible.
Get the dry ice you need just the way you need it from Irish Carbonic. We’ll deliver your order when and where you want it or make it available for pick-up in Central or Western New York.
Contact Irish Carbonic today to learn more or to place your order for dry ice!
Dry ice can do some nifty things – from helping your plants grow to acting as a mosquito repellent in your back yard. It can even help you tackle that DIY project you’ve been putting off: removing an old tile floor.
Yup, you read that right: dry ice is so cold that it will shatter the glue bonds that make old vinyl, asphalt and linoleum floors virtually impossible to remove any other way.
Learn how to remove old tiles with dry ice below – just remember to always follow all precautions for safe dry ice use and handling!
What you’ll need
- 30 lbs. dry ice
- Insulated gloves
- Wax or parchment paper
- A hand towel or rag
- A small flexible putty knife
What to do
- Make sure your room is well ventilated and keep small children and pets away (since dry ice emits a small amount of CO2)
- Tear off a piece of wax / parchment paper large enough to cover a tile plus about 1 to 2” of overhang on each side.
- While wearing insulated gloves, place a block of dry ice on top of the paper to cover the tile you want to remove; cover the ice with a towel or two to insulate it.
- Wait 2-3 minutes; you can sometimes hear a “pop” when the tile comes loose.
- Slide the edge of the paper to reposition the dry ice to the next tile.
- Use the putty knife to lift the previous tile; put the junk tile in a bag or box (it can re-adhere once it re-warms if you leave it on the floor).
- Repeat these steps until the floor is done!
Ready to take on your old tile floor, or any other dry ice DIY project? We’ve got all the dry ice you need. Stop by one of our convenient locations in Buffalo, Rochester, or Columbus today!